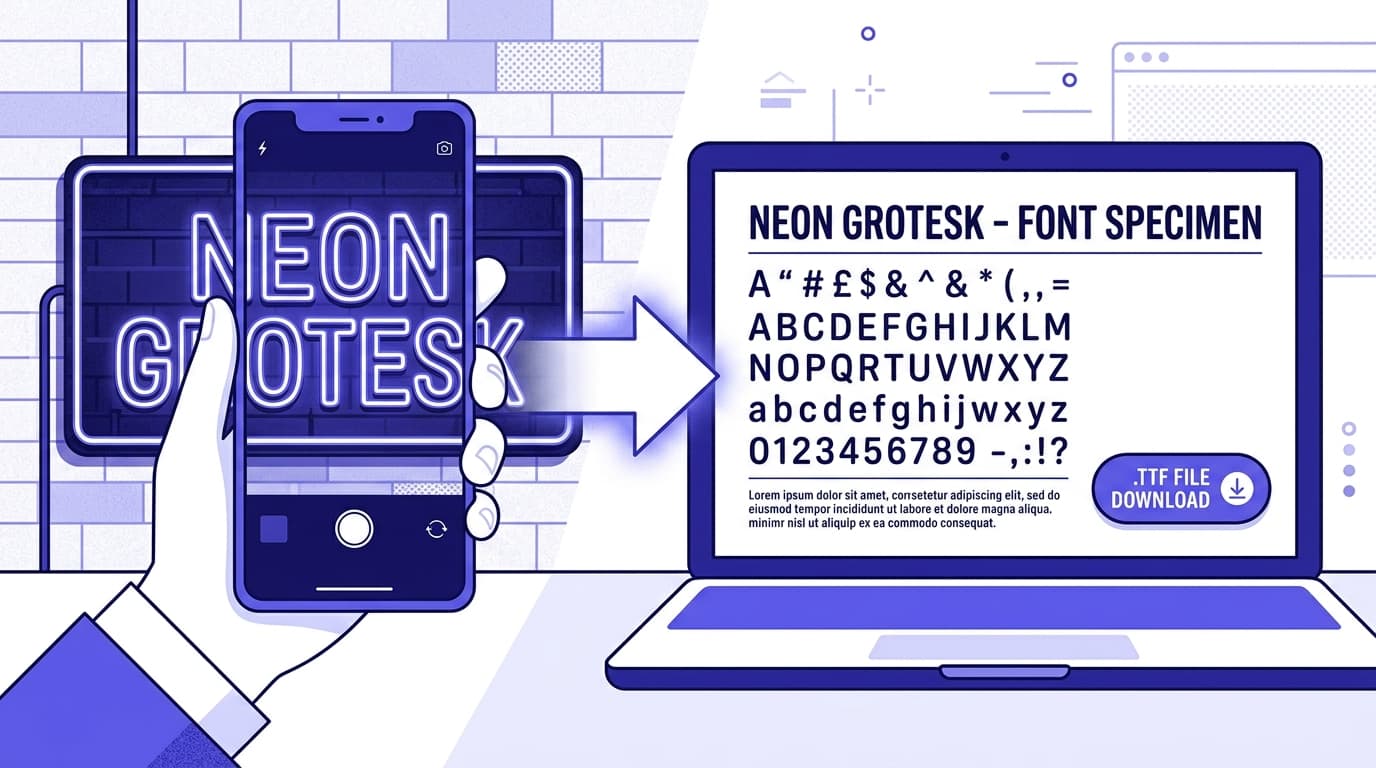
An old photograph can preserve far more than a face, building, or moment in time. Storefront signs, book covers, product labels, posters, newspapers, vehicle lettering, and handwritten captions often contain letterforms that no longer exist in any readily available type library. For designers, archivists, family historians, and brand teams, that makes a font from an old photograph a valuable starting point—not just a visual curiosity.
The challenge is that an old photo font is rarely clean. It may be faded, distorted by camera angle, obscured by scratches, or represented by only a handful of letters. Recreating it requires equal parts observation, image preparation, type knowledge, and practical decision-making. The goal is not always a museum-perfect copy. Often, the most useful outcome is a faithful, usable digital typeface that retains the character of the original while working in modern design software.
This guide explains how to identify and recreate a vintage font from photo evidence, from selecting the best source image through extracting letters, repairing damage, and turning the result into a working font file. Along the way, you will learn when to seek an existing match, when to build your own historical font recreation, and how to avoid common mistakes that make revived lettering look too polished or inauthentic.
Why Old Photos Are a Gold Mine for Type
Historical typography is everywhere in archival photography. Before standardized digital font libraries, lettering was frequently painted by signwriters, drawn for a single advertisement, cast by a local printer, or modified by hand for a particular business. Even when the underlying typeface was commercially available, the final result may include unique spacing, outlines, shadows, condensed proportions, or hand-painted details that make it distinct.
That is why a vintage typeface from image material can offer something a generic “retro” font cannot: context. A 1920s bakery window may reveal narrow, high-contrast capitals designed to be read from across a street. A 1950s motel postcard might use exaggerated script with a drop shadow. A wartime newspaper masthead can show practical display lettering built for ink, paper, and fast production. These details communicate an era more convincingly than simply applying a sepia filter to modern text.
Old photographs are especially useful because they capture type in its intended environment. Look at how the letters relate to architecture, packaging, or surrounding imagery. A sign that appears slightly irregular may not be badly made; its widening strokes may have been deliberate compensation for viewing distance. A light-colored outline might have been added to keep dark letters readable against brick. Those clues matter when you recreate vintage font designs.
It is also helpful to distinguish between identifying and recreating. Identification means finding the original typeface or the closest available match. This is possible when the photo shows enough distinctive features: the shape of the capital R leg, the bowl and ear of a lowercase g, the terminals on C and S, or the angle of a crossbar. Recreation is the better route when the source is custom lettering, a rare face, or too degraded for a confident match. In many projects, the practical answer is a hybrid: identify the general typographic category, then rebuild the specific letters visible in the photograph.
Before investing time, consider the intended use. If you need one word for a documentary title card, manual redraw may be enough. If you need menus, posters, web graphics, or multilingual branding, you need a broader character set and more consistent spacing. Defining the outcome early prevents a common trap: spending hours pursuing exact historical accuracy when a legible, stylistically faithful interpretation would serve the project better.
Preparing an Old Photograph for Font Identification
Start with the strongest available source
The quality of your source determines how much of the original letterform you can recover. Whenever possible, work from the original print, negative, scan, or highest-resolution digital copy—not a screenshot of a social media post. A scan at 600 dpi is a useful baseline for small printed material, while larger signs may benefit from a high-resolution camera capture taken straight-on in even light.
Choose the sample with the most complete and varied letters. A photo containing “RIVERSIDE HOTEL” is much more useful than one containing only “HOTEL,” because it provides repeated strokes, curves, diagonals, and different widths. Repeated characters are particularly valuable: compare the two Es or the two Ts to tell whether an apparent defect is actual design or simply damage. Numbers, punctuation, and lowercase letters can also reveal whether the lettering is a formal typeface, hand lettering, or a modified display style.
Make a non-destructive working copy before editing. Crop tightly around the text, then save an untouched master file separately. Straighten the baseline and correct perspective when the sign or page was photographed at an angle. Perspective correction is essential: letters on a receding wall may appear narrower or taller on one side, producing inaccurate proportions if you trace them as-is. In an image editor, use a four-corner perspective transform so parallel sign edges become parallel in the corrected image.
Next, improve clarity without erasing meaningful detail. Convert a duplicate to grayscale, adjust levels so the lettering separates from the background, and use selective contrast rather than maximum contrast. Excessive sharpening can turn film grain into false serifs and damage into fake texture. For faded gold lettering on a dark storefront, color-channel adjustments may work better than grayscale; one color channel may preserve significantly more contrast between paint and background than the others.
A useful workflow is to create three working versions: a corrected color image, a high-contrast grayscale image, and a thresholded black-and-white image. The color version retains information about shadows and painted edges. The grayscale version helps you judge form. The thresholded version can make segmentation and automated extraction easier. Compare all three rather than assuming one edit represents the truth.

The Extraction Process: From Photo to Usable Letterforms
Separate, inspect, and build a consistent alphabet
Once the image is prepared, isolate each readable character. Begin with the clearest letters, not necessarily the first ones in the word. For example, an O can establish the overall roundness and contrast of the design, while an H can reveal stem thickness and crossbar placement. A capital A may show whether the type has a low, middle, or high crossbar. Build a small reference sheet containing every visible character and note where each one came from in the photo.
At this stage, assess the typeface’s structural rules. Ask practical questions: Are vertical stems heavier than horizontal strokes? Are curves nearly circular or vertically stressed? Do terminals end bluntly, in teardrops, or in small serifs? Is the baseline level? Are letters tightly packed because of the design, or because a signwriter adjusted them to fit the available space? These observations turn a collection of image fragments into a system.
If you are trying to identify an existing typeface, compare distinctive letters before comparing the overall mood. A condensed sans serif might look broadly similar to dozens of faces, but the shape of its G, R, Q, or lowercase a may narrow the field quickly. Search type specimen books from the relevant period, foundry archives, library collections, and font-identification communities. Remember that many old signs use altered type, so an exact digital match may not exist even if the underlying design came from a known family.
For an actual historical font recreation, extract the letter outlines into vector paths. You can manually trace them in vector software or use an image-to-font workflow to generate an editable starting point. Snapafont can be useful here: upload a cleaned image containing the characters you have, review the extracted glyphs, and download a usable .TTF font file to test in your usual applications. Automated conversion saves time, but the best results still come from preparing the source carefully and checking the output character by character.
Do not attempt to perfect every glyph independently. Consistency is what makes the resulting font feel credible. Set basic guides for the baseline, cap height, x-height, ascender height, and descender depth. Then compare related shapes: O, C, G, and Q should share a common curve logic; H, E, F, and I should align in stroke weight; M, N, V, W, and A should have compatible diagonal angles. If your photo contains only capitals, it is usually better to create a strong all-caps display font than to invent lowercase letters with no evidence.
Test early by typing real words, not just viewing individual glyphs. A letter can look accurate alone but appear too wide beside another letter. Test pairs such as AV, TA, To, WA, LY, and RO, then test the words from the original sign. Adjust side bearings and kerning only after the core shapes are stable. This is also where you can decide whether to retain small irregularities. A slightly uneven crossbar or imperfect curve may be a defining part of the source’s charm; random inconsistency across every letter usually is not.
Handling Damage, Noise, and Missing Characters
Damage is normal in a font from old photograph material. Creases, dust, silvering, faded ink, motion blur, reflections, and shadows can hide portions of letters. The key is to separate accidental damage from intentional construction. Compare repeated letters and nearby strokes before repairing anything. If one E has a broken middle arm but another E does not, the break is probably damage. If every E has a short middle arm, it is likely a design feature.
Use symmetry and typographic relationships to reconstruct missing areas. If half of an O is obscured, the visible half can often be mirrored and then adjusted to account for optical asymmetry. If the bottom of an R is hidden, inspect the leg angle in A, K, N, or other diagonals. If a serif is missing from one stem, compare serifs on similar vertical strokes. These are informed inferences, not guesses made in isolation.
Be cautious with automated noise removal. Aggressive denoising may eliminate thin hairlines, small counters, or texture that identifies the style. Instead, duplicate your file and repair in layers: first remove obvious dust and scratches, then rebuild broken edges, then smooth only the parts that need smoothing. At high magnification, it is easy to overcorrect. Zoom out frequently to see whether the letter still reads like the photograph at normal viewing size.
Missing characters require a documented strategy. You may derive a missing P from an R by removing the leg, create a B from two related bowls, or construct a lowercase set based on period-appropriate conventions. But label these additions as reconstructed rather than directly sourced. This matters for archival integrity, especially if the font will support a museum, local-history project, or restoration work.
When historical accuracy is important, preserve a reference folder with the original image, edited versions, crop locations, notes on inferred glyphs, and a record of every significant change. That documentation lets others understand the limits of the recreation. It also makes future refinement easier if a better photograph or a complete printed specimen appears later.
What to Do With the Recreated Font
A recreated font becomes most valuable when it is tested in the setting it was made for. Start by typesetting the original word, sign, or headline from the photograph. Compare the digital result side by side with the source at a similar scale. Look beyond exact outlines: check overall width, spacing rhythm, visual weight, and the way letters occupy space. A historically convincing result may need slightly tighter spacing or a less mathematically perfect curve than a contemporary geometric font.
Then test practical use cases. Print a small poster, create a social graphic, set a menu heading, or add the font to a short video title sequence. Check it on different backgrounds, particularly if the original lettering included outlines, shadows, inline strokes, or painted highlights. A font file generally captures the core letter shape; decorative sign effects may be better recreated as separate layers in a design program so they remain flexible.
For broader use, build a sensible character set. At minimum, include uppercase and lowercase letters only if both are supported by evidence or a clear design decision, plus numerals and common punctuation. Add accented characters if the project needs them. If the source is a display face with dramatic irregularities, consider keeping it purpose-specific rather than forcing it into body copy. A recreated vintage font often works best at headline sizes, where its original personality remains visible.
Review licensing and rights before commercial distribution. The photograph itself may be copyrighted, and some typefaces—especially later twentieth-century designs—may still be protected or have active trademarks associated with their names. A recreation based on historical material is not automatically free of legal considerations. For personal, educational, or internal archival uses, the situation may be straightforward; for a product, campaign, or public font release, seek qualified legal guidance.
Finally, preserve both the polished output and the imperfect evidence. The clean font can be used in modern layouts, while the source photos and process notes retain the historical story. That combination is what makes old photo font restoration meaningful: it gives forgotten lettering a second life without pretending that its origins were digital.
Turn Your Best Lettering Sample Into a Font
You do not need a flawless archival scan or a complete alphabet to begin. Choose the clearest text in your photograph, correct perspective, improve separation between letters and background, and start with the characters that reveal the most about the design. A small, well-prepared sample can be enough to create a useful custom display font for a restoration, family project, historical exhibit, or brand revival.
If you are ready to move from image cleanup to a working font, try Snapafont at snapafont.com. It helps turn letterforms from a prepared image into a downloadable .TTF file, giving you a practical foundation for testing, refining, and using your vintage typeface from image research. Begin with the strongest source you have, review the generated glyphs closely, and let the original photograph guide every refinement.
Ready to turn your image into a font?
Upload any image and get a real, downloadable .TTF font file in seconds.
Try Snapafont Free →